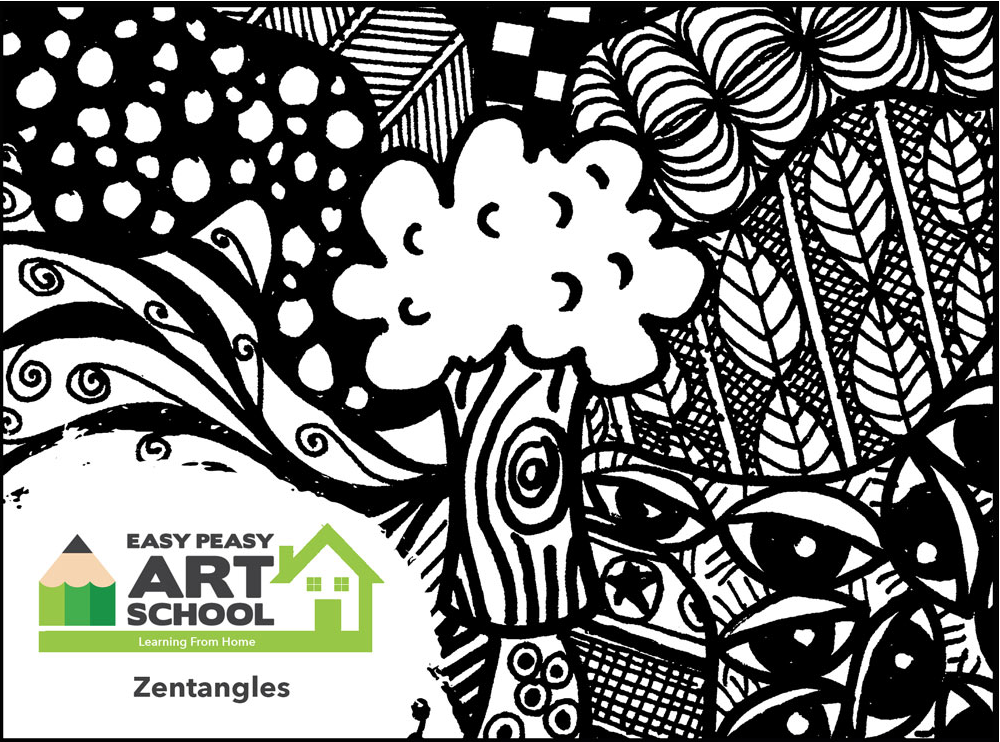
This lesson is all about doodling, pattern drawing or creating ‘zentangles.’
Artworks like these can be loads of fun and are also incredibly relaxing.
Our zentangle artwork focuses on detail and pattern. You will need to really concentrate on being as accurate as possible when your lines or patterns meet to create a neat and appealing artwork.
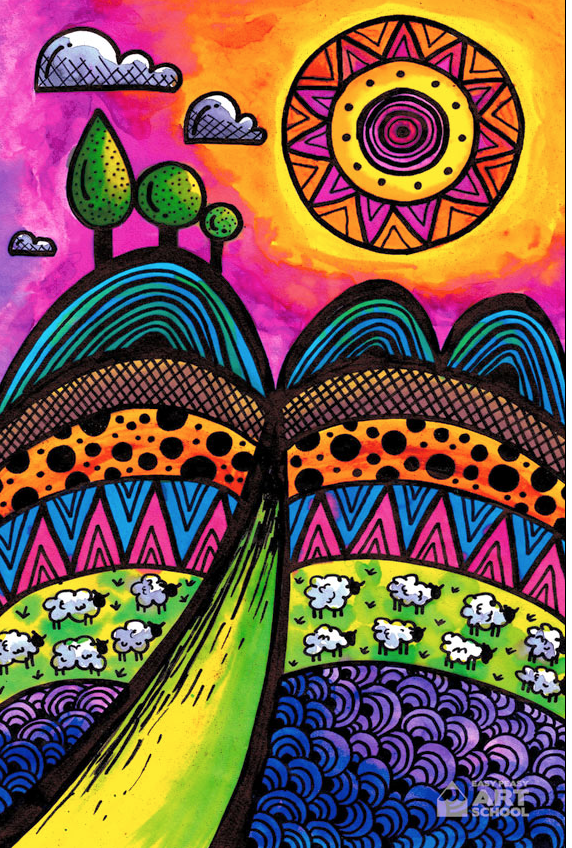
This colourful landscape artwork features patterns that are used to break up each of the spaces in the drawing.
Artworks like these can be loads of fun and are also incredibly relaxing.
Our zentangle artwork focuses on detail and pattern. You will need to really concentrate on being as accurate as possible when your lines or patterns meet to create a neat and appealing artwork.
This colourful landscape artwork features patterns that are used to break up each of the spaces in the drawing.
Creating Your Artwork: Place your paper portrait style.
- Drawing: Using your marker, place a dot in the middle of the page as a starting point.
- Draw two large hills and a curved road as shown. This artwork is all about neatness. Try to be as smooth and neat as possible when drawing and joining your lines. To achieve this, think about your lines. Think about where you will start, where you will finish and then draw slowly.
- Draw one large hill on the left and two smaller ones on the right as shown.
- On an artwork that features so many lines, it's important to make some stand out more so that there is a contrast in your design. If all the lines are the same thickness, you wont see the individual sections. Make each of the lines we have drawn so far thicker by tracing right next to them.
- Then carefully colour. Do you notice that we have made the road get gradually thicker to help create the illusion of perspective?
- Begin dividing up the space by drawing more curved lines from the road to the sides of the page. Try to line up the lines on each side of the road. Try to also use perspective. The curved spaces should be thinner in the background and gradually become thicker as they come closer into the foreground.
- Complete the curved lines to divide the space in the lower part of the artwork.
- On top of the left hill draw a water drop shape and two joining circles to represent trees.
- Add thick trunks and small details to add interest and make the trees appear round.
- Balance the trees with three neat circles on the right to represent the sun. Make the sun nice and big to fill the space.
- To draw clouds, start with three horizontal lines. Have you noticed that most clouds have flat bases and the lower to the horizon, the smaller they are?
- Complete the clouds as shown using simple curves and small details.
- Patterns: We will now begin adding patterns and designs to our drawing. In each section of the sun, draw neat patterns and designs. Try to use both thick and thin lines. What's also really important is to try and use contrasting patterns next to one another. For example, if you use lines for one pattern, try to use circles or dots next door. Or, if one section of pattern is really dark, try to make the next section lighter by not colouring as much.
- Add thin lines called cross hatching to the bottom of the clouds for shading and tiny dots to the trees so that they have contrasting pattern styles.
- Add shading to the road as shown.
- Begin adding patterns and designs to the hills and landscape. Notice how we have used contrasting pattern styles and combinations of thick and thin lines.
- Complete your pattern designs on the remainder of the landscape. Try to be as neat as possible and use as much detail as you can. The more detail, the more impressive your artwork will look.
- Colouring: To add colour, you can use felt marker or water colours. If using markers, try to blend light and dark colours in each of the sections. If using paint, prepare your workspace with your materials. You might need a variety of brush sizes for all of the detail.
- When painting, try to blend lighter and darker colours in each shape to create interest. a good tip to remember is that if you accidentally use too much paint, soak up the excess using a small piece of paper towel.
- Keep painting until you have filled all of the spaces and your artwork is looking bright and colourful.
- Your artwork is now complete.
